Loading cart contents...
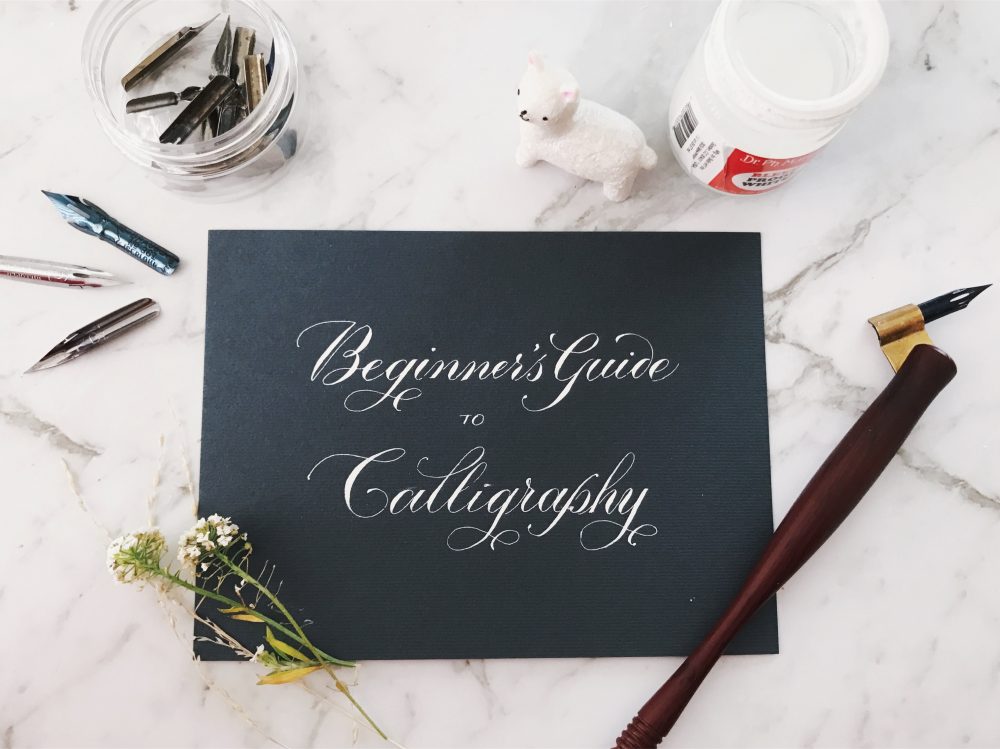
Beginner’s Guide to Calligraphy | Getting Started

Whether you want to learn modern or traditional calligraphy, there are many basic and fundamental questions that we all have about getting started. I completely understand being in that position! So I have created this guide that will help you find the answers and get you ready!
If calligraphy & lettering is completely new to you, don’t worry, we all came from here, and I’ll show you how to get through the first few steps! If you have already taken a start, you can still read this guide as I know the questions “what ink are you using…” and “what nib..what paper…” don’t always stop there.
MATERIALS

As I live in Australia, calligraphy materials can be quite scarce and hard to find. When I started, I had to purchase most of my materials online from overseas sellers. But luckily, now that calligraphy is becoming more popular, especially on social media, many art stores now carry some of the basic tools.
Here’s a list of websites that I use:
Paperinkarts , Johnnealbooks , Jetpens
If you are also in Australia, I recommend also browsing through these two lovely local suppliers:
CalligraphySuppliesAustralia, NotJustACard
1. NIBS
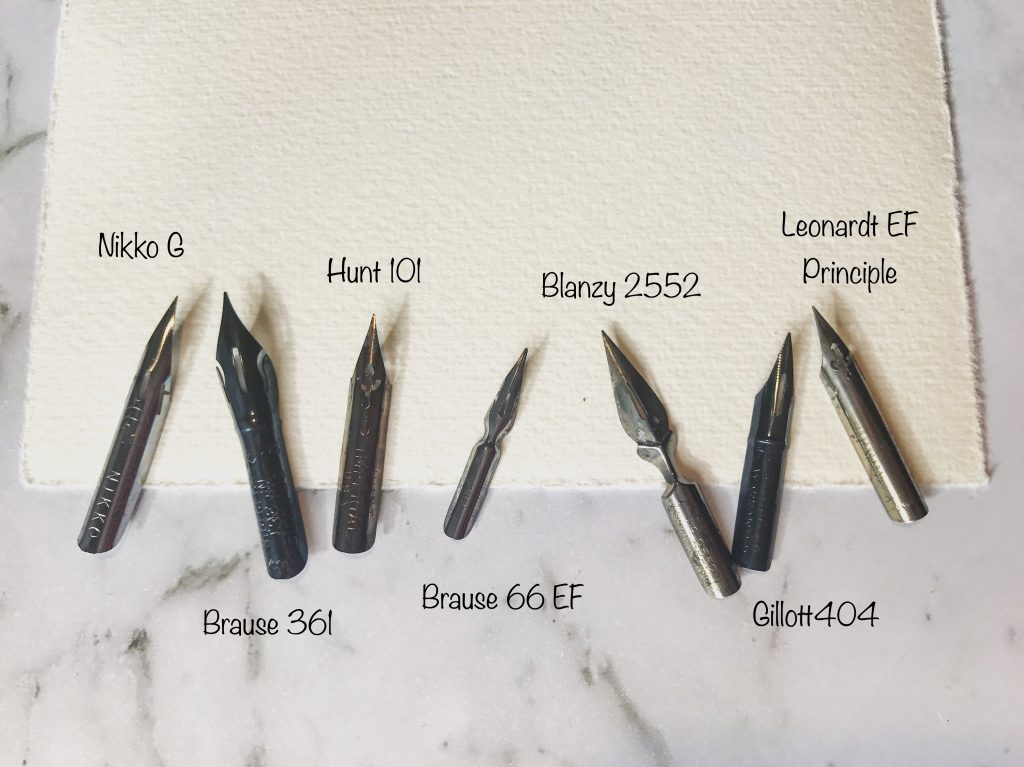
There’s an endless list of pointed pen nibs, and I tend to like switching them around a bit and always try out new nibs.
However, here are three nibs great for beginners as they are usually quite accessible in most places.
- G nibs (Nikko G, Zebra G, Tachikawa G)
- Brause 361
- Hunt 101 (can be found in most art stores)
I highly recommend starting out with the G nibs as they are stiff and touch nibs with very long lifetimes. Once you have had some practice, I recommend trying out different nibs. Every pointed nib has its own unique feel that’s not just limited to stiffness, and the key is to not rely on one single type of nib for your work.
Below are a few of the nibs I use regularly:
2. PEN HOLDERS
The most commonly used pen holders are straight and oblique. My advice is to keep a straight pen holder and an oblique pen holder with you. If you are serious or semi-serious about calligraphy, try to find an oblique pen holder that has an adjustable metal flange. For an affordable option, I recommend the ‘Moblique’ 2-in-1 Pen holder by Luis Creations (which I supply to all my students for my workshops) or the Yoke Pen Co ‘Deuce’ Pen holder. Both of these are designed by professional pen makers, so they are guaranteed to have the right balance in weight, flange angle and grip.
The standard oblique pen holders can be used by both left-handed and right-handed calligraphers. My friend Younghae from Logos Calligraphy is a pro left-handed calligrapher and she has some tips on how you can go about it if you are also left-handed.
3. INK
When it comes to picking ink, note that more expensive ink does NOT equal more user-friendly ink. The result of your ink can really depend on what surface you are writing on.
My go-to practice inks are: Sumi ink (Daiso works great!), Walnut ink (see below), Higgins India/Eternal ink and Dr Ph Martin’s Bleed proof white ink.
Dr Ph Martin’s Bleed-proof white is my favourite white ink. The name says it, I still haven’t found one surface where this ink bleeds on. It comes in a thick paste when you first open the bottle (and most of the time, the pigments are suspended from the clear liquid). To use it, I like to scoop some out into a dinky dip (mini ink jar) and mix water in until it reaches the right consistency (flows out smoothly, colour should be opaque, not translucent).
Walnut Ink is one of my favourite inks for practicing! I usually buy them as a large container of walnut crystals and mix the ink myself.
How to Prepare Walnut Ink (Easy!)


- Scoop out your walnut crystals into an inkwell or dinky dip. (I use Approx. 1 teaspoon per 30 mL)
- Fill with lukewarm water.
- Leave it there for 10 minutes, no stirring is needed!
That’s it!
4. PAPER
Choosing the right paper is so important for your practice. Make it easy for you self at the beginning by using the right paper that will help you grasp the skills faster. So that you don’t have to focus on the crazy bleeding, or fibre being pulled off by your nib while you are still learning the basic strokes. (of course this can also be a result of other factors which I will cover later on)
So here are the key properties to look for when choosing practice paper:
- Smooth (textured paper are beautiful, but can be a pain to write on at the beginning)
- Bleed-proof!
- Cheap (don’t spend $$$ on practice paper)
Popular brands include Rhodia, Muji and my favourite practice paper to date has actually been Arttec Bleedproof Paper
Cartridge paper (printing paper) can also be used for practice, but not all printing paper are made equal when it comes to ink. I have tried a few different options and I have found this one to work quite well with walnut ink. Printing paper are generally much cheaper and great for practicing, but make sure to test them out for bleeding before you purchase a bulk.
Other materials to keep next to you while writing:
- Paper towel (duh!)
- Jar of water
- Dripper bottle
- Small cheap paint brush
Now that you have prepared your materials, we will need to give your nibs a little more attention.
PREPARATION OF NIBS
It will save you a lot of frustration!
Brand new nibs are coated with a layer of oil/wax/(some kind of hydrophobic material) to stop them from rusting. This means that a brand new nib is unable to pick up any or enough ink for writing until this layer is removed.
Nibs vary vastly in size, thickness and hardness, so it’s important to avoid any methods that might damage a new nib.
You can definitely go and buy a nib preparation chemical to remove the protective layer, but there are several methods which only require things you already have lying around at home, and the results are the same!
Here are some of my favourite methods:
Toothpaste (avoid whitening): This is what I used from the very beginning, it works for almost any nib. Use a Q-tip and give the inside of the nib a good rub with toothpaste, then wash it off completely.
Ink: Believe it or not, this is what I use for all the smaller and more delicate nibs (Gillott, Leonardt principle, etc)
Here’s how: I like to use my walnut ink to prepare my nibs (cheapest ink I own). Simply dip them into the walnut ink for a few seconds and then gently rub the inside of your nib with a paper towel. Repeat this a few times. Now try dipping them into the ink again, if the ink is being held inside the nib, with the hole covered, it means your nib is ready to go!
Potato: Yup, you read it correctly! Potatoes actually contain an enzyme that breaks down the protective layer, so recently it has become a trend to stick nibs into a potato for preparation. This is a great idea if you need to prepare a large number nibs. All you need to do is gently stick your nibs into the potato, just past the vent hole, and then wait fifteen minutes. Then pull them out and give it a rinse, and they’ll be ready to use! Make sure to set a timer as over-prepping the nibs will damage them!
Note: For all these methods, you will only need to apply the product up to just over the “hole” of the nib, which is your dipping depth. This not only makes your job easier, but it also prevents ink from staining the upper parts of the nib (Read more about it below)
INSERTING THE NIB

When using an oblique holder, there’s a simple rule of how deep your nib should go inside the flange. As shown in the picture above, the nib goes deep enough so that the tip of the nib aligns with the centre of the holder.
If you own a flange plier, you can easily adjust your flange to fit different nibs. Otherwise you can also gently push the flange with your hand to adjust its shape for different size nibs. However, try not to regularly adjust the flange as this can damage the pen. So I recommend owning at least 2 oblique holders to fit the general “large” and “small” nibs separately.
THE DIPPING RULE
This might be the most fun part of starting calligraphy. We are going back decades to use the dip pen again. So here is one simple rule, the dipping depth should be just above the vent hole of the nib, which allows it to hold a good amount of ink.
As shown above, the ink should not reach the flange, as it can get trapped in the flange and damage both the nib and the flange.
CLEANING & STORING YOUR NIBS
Always clean your nibs right after using them as dried/hardened ink can be hard to remove and may even damage the nib. For cleaning water based inks, simply dip them in water and wipe with a paper towel. For cleaning off waterproof inks, dipping the nibs in rubbing alcohol is the easiest method. When cleaning your nibs, be very gentle with it and always avoid touching the tines with your fingers as they can
After cleaning your nibs, let them dry completely and store them in a sealed nib container or tin. I use small cosmetic tins to store them.

I hope that you have found this beginner’s guide helpful for your calligraphy & lettering journey. Please let me know, in the comments below, if you have any questions or anything that you would like me to cover in the future! 😁
Have a wonderful day!
Love,
Charlotte
Be the first to know!
Enjoyed reading this blog? Sign up to our newsletter so that you get notified when I write a new one!
Don’t worry, spamming is not our thing!
34 Comments
Join the discussion and tell us your opinion.
Nice blog please keep updating 😳
Thank you Chris! Will keep you updated! 😄
Beautiful! Loved this blog. If you could get directly into practice strokes, miniscules and maja scales, it would be of great help. Keep it up! Expecting better stuff from you😊
Hi Yash, thanks for the suggestion and glad you enjoyed this blog! I will definitely look into talking about specific scripts in the upcoming blogs 🙂
Thank you for the input. It make a big difference, as a beginner, knowing all these little details about Calligraphy before starting. I have been getting all the needed supplies to start practicing and just finding myself looking at them and thinking: now what? What I would love to find, and still searching for it, it’s a left-handed oblique pen with the adjustable flange. Is there such thing or Am I hoping for too much? Thank you again for sharing your beautiful gift with all of us. ❤️ Love seeing your work.
Hi Idalia, thank you for your feedback! Yes, left oblique holder works the same way as a right oblique holder, but just for left-handed users. So the nib placement will be exactly the same. I have seen several online stores that supply left oblique holders, including some of the websites I mentioned. I believe Yoke Pen Company also supplies some basic left oblique holders. Hope this helps! 😄
I was waiting for a blog like yours! Really helpful. Keep updating 🙂
Thank you so much! Will keep you updated ^_^
Thank you for sorting out all the information found in the web once and for all! 🙂
Glad it’s helpful Yishai! 😄
Great job.. everything to start!!
Thank you Anita! ^_^
Thanks for sharing Char! It was super informative and I also love your marble background! Looking forward to reading more posts!
Thank you Fiona! Glad you found it helpful, and yes the marble vinyl is working really well for the photos haha! 😉
That was really clear and understandable, Thank you for writing such an amazing article. However I would also like to know more about spacing of letters and layout fof the paper(eg. Invitation cards, Greeting cards etc)
Thank you Yasar, I have recently posted a new blog where I covered a little about using guidelines for practice and envelope addressing. Check it out 🙂
Thank you for this beautiful post. I’ve already learned so much calligraphy from your instagram.😍 I’ve been working on pointed pen calligraphy for months. What I still struggle with is that I don’t know how I should dip the nib in the ink so it holds the ink long enough to write at least one whole word, let alone a whole line! I’m beginning to think it needs some sort of magic!😓 I even use brush to apply ink on the nib, still the ink doesn’t flow easily on the nib.
Hi Laila, regular nibs usually only hold enough ink for a 3 to 4 words maximum, so that is totally normal! What you can get is a nib with an ink reservoir. (looks like a spring attached under the ink) and this should solve your problem. If it’s not holding enough ink for even one word, it could be due to you not preparing the nib enough or if you touch the nib with your fingers, causing the oil to transfer and unable to pick up ink. 🙂
Excited! Love Your work, thanks for sharing <3 Greetings from Germany! 🙂
Thank you Nancy! 🙂
Great bolog and also greater guide !! I’m amazed why i hadn’t visited here till now 😂😂 . Althought I’m not a biginner but it was really useful for me …. u make me more and more interested in calligraphy by your beautiful artworks 😍 thanks again 🌷🌷
Thank you so much! I’ll keep you updated 😀
Hey there! I’m from the Netherlands and I’d like to start with practicing calligraphy, I found your account on instagram and I was totally in love with it the first second I saw it. Do you have a YouTube account where you teach this? Keep me updated! Lots of love from Lejanne
Hi Lejanne, thank you! I do have a youtube account, but it’s mainly art related videos, I will keep you updated though 🙂
magnifiqué
Thank you! 😀
Wauw super beautifull and iff you do it it sees so easy. Can t waight for more tips. THanks.
Amazing Site. Very much enjoyed reading.
Magnific! Splendid! Un manual cu modele de litere? Din România, cu drag!
Love this! <3 So helpful as I did my nib shopping.
I found yer website looking for “Charlotartscript”. Thank you for the explanation.
Other than the flourishing, how is it different from USA cursive?
A friend gave me the Learn American Handwriting, (vols 1, 2) which I will attempt to learn Spencerian, but I need to learn Copperplate, first.
Wow this very helpful thank u so much
wow this is fascinating. i just wonder where i could buy the materials. i love writing and i think this would help me develop my skills.
Thank you soo so much for this. I need to book into one of your classes, as soon as I can. I was just wondering if you could post a pic of the ink you recommend from Daiso please & thanks : )